Dairy Free Recipes for Weight Loss and Clear Skin
Storage and Serving Suggestions
This quinoa salad can be enjoyed immediately or stored for later use. If you choose to make it ahead of time, store it in an airtight container; it can last up to five days in the refrigerator. For optimal flavor, allow the salad to sit for at least 30 minutes after preparation so the dressing can meld with the ingredients.
Consider serving this salad as a side dish at family gatherings or barbecues, where the freshness and vibrant colors can impress guests. Remember, adding a sprinkle of fresh herbs like parsley or mint can enhance the flavor profile further, creating a refreshing and appealing dish.
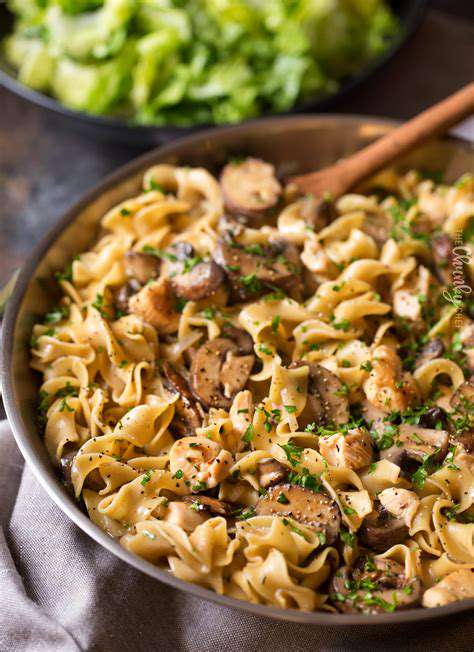
3. Zucchini Noodles with Avocado Pesto

Ingredients for Zucchini Noodles
To create delicious zucchini noodles, you'll need fresh zucchini, preferably organic to avoid pesticides. The Quality of the zucchini directly impacts the taste of your dish, so choose firm and unblemished vegetables. The spiralizer is an essential tool for this recipe; it transforms zucchini into long, spaghetti-like strands. Additionally, you'll want to gather a ripe avocado for the pesto, fresh herbs such as basil, garlic, and lemon juice to add flavor. You may also consider nutritional yeast for a cheesy flavor, which can enhance the dish without adding dairy.
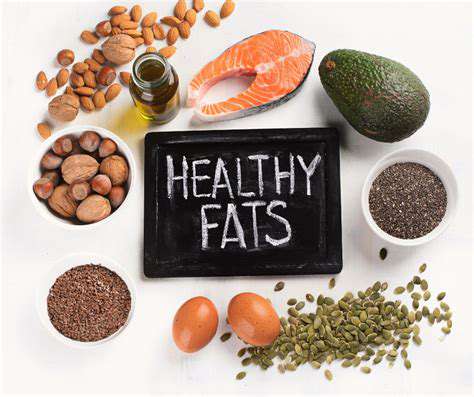
When it comes to making the pesto, using ripe and creamy avocados will ensure a smooth, rich texture. Avocados are packed with healthy fats, which contribute to improved skin health, making this meal not just nutritious but also beneficial for skin clarity.
Preparation Steps and Tips
- Start by spiralizing the zucchini into noodles and set them aside.
- Prepare the avocado pesto by blending avocado with basil, garlic, lemon juice, and seasonings.
- Toss the zucchini noodles with the pesto before serving.
- If desired, add cherry tomatoes and pine nuts for extra flavor and texture.
After spiralizing the zucchini, it’s crucial to lightly sauté the noodles for just a few minutes. This process retains their crunch while making them warm and inviting. Be cautious not to overcook them; otherwise, they can become mushy and lose the appealing texture. You can cook them in a non-stick pan on medium heat for about 2-3 minutes. Combining the warm noodles with the cold avocado pesto creates a delightful contrast that tantalizes the taste buds.
Serving zucchini noodles with avocado pesto is versatile and allows for creative experimentation. I recommend trying additional toppings like grilled shrimp or chicken, which not only boosts protein but also enhances satiety – an important factor for anyone on a weight loss journey. Remember, presentation matters; a beautifully arranged dish often tastes better too.
4. Snacking Smart: Roasted Chickpeas
Benefits of Roasted Chickpeas as a Snack
Roasted chickpeas are an excellent snack option for those aiming for weight loss and improved skin health. Packed with protein and fiber, they keep you fuller longer, reducing the temptation to reach for less healthy options. Interestingly, studies show that diets high in dietary fiber can significantly aid in weight management by promoting satiety.
Moreover, chickpeas are rich in antioxidants like vitamin C, which is known for its skin benefits. Antioxidants combat free radicals, potentially reducing skin damage and signs of aging. Incorporating roasted chickpeas into your diet could thus contribute to a radiantly clear complexion.
How to Make the Perfect Roasted Chickpeas
Creating the perfect roasted chickpeas is simple and rewarding. Start by rinsing and drying canned or cooked chickpeas thoroughly. A good tip is to use a kitchen towel to remove excess moisture, ensuring they crisp up nicely in the oven.
After drying, toss the chickpeas with olive oil and your choice of spices — paprika, garlic powder, or even a sprinkle of cayenne for heat. Spread them evenly on a baking sheet and roast at 400°F (200°C) for about 20-30 minutes, stirring halfway through. The end result should be golden and crunchy, perfect for snacking!
Flavor Variations for Roasted Chickpeas
There are numerous flavor profiles you can experiment with when making roasted chickpeas. For a Mediterranean twist, consider seasoning with lemon zest, oregano, and a drizzle of olive oil. Alternatively, for an Asian-inspired snack, use soy sauce, sesame oil, and a pinch of ginger powder before roasting.
Don't hesitate to try sweet variations as well! A sprinkle of cinnamon and a drizzle of maple syrup post-roasting can create a delightful contrast for those with a sweet tooth. The versatility of chickpeas means you can adjust flavors based on your preferences and health goals.
By customizing the spices and flavors, not only do you cater to your taste, but you also keep your snacking routine fresh and exciting!
Storage Tips for Roasted Chickpeas
Storing roasted chickpeas can be a challenge, especially if you want to maintain their crispiness. Once they've cooled, keep them in an airtight container at room temperature, where they can last up to a week; however, they'll be best if consumed within the first few days.
If you notice they’ve lost their crunch, a quick reheat in the oven for a few minutes can rejuvenate them. This is an ideal way to ensure you maximize your snacking experience while enjoying the health benefits they offer.
Incorporating Roasted Chickpeas into Your Diet
Incorporating roasted chickpeas into your daily meals goes beyond snacking. Consider adding them to salads or grain bowls for added texture and protein. They also make a fantastic topping on soups, creating a unique blend of flavors and crunch.
For those looking to enhance their meal prep, roasted chickpeas can be used as a healthy crouton substitute. Additionally, blending them into smoothies can provide a protein punch without altering the overall taste. This adaptability makes them an ideal food for both weight loss and skin clarity.
As you explore different methods, schedule regular inclusion of roasted chickpeas in your meal planning. This not only fosters variety but also guarantees that nutritious snacking becomes an effortless part of your lifestyle.
5. Hydrating Matcha Chia Pudding
Ingredients for Hydrating Matcha Chia Pudding
To create a delicious Hydrating Matcha Chia Pudding, you will need a few key ingredients. Start with 2 tablespoons of chia seeds, which are rich in omega-3 fatty acids, fiber, and protein. Additionally, you will require 1 cup of almond milk or your preferred dairy-free milk, as it adds creaminess while keeping the recipe light and nutritious.
Matcha green tea powder is the star here, so include about 1 teaspoon. Matcha not only provides a vibrant color but is also packed with antioxidants, enhancing overall health. A touch of natural sweetener like maple syrup or agave nectar can enhance the flavor without compromising the recipe's benefits.
Finally, consider a pinch of sea salt and a splash of vanilla extract for added depth. These ingredients will elevate your pudding's taste and balance the flavors harmoniously.
Health Benefits of Chia Seeds
Chia seeds are remarkably nutritious, making them a suitable choice for a weight-loss-oriented diet. Rich in fiber, a mere 28 grams (about 1 ounce) can provide over 10 grams of fiber, which is essential for digestive health. This high fiber content not only helps you feel full but also facilitates smooth digestion.
Moreover, chia seeds are a powerhouse of antioxidants, combating oxidative stress and inflammation in the body. They're also an excellent source of protein, with about 4 grams per ounce, which aids muscle repair and keeps you satiated longer. Incorporating chia seeds into your diet can thus contribute significantly to weight loss and skin health.
Preparing the Matcha Chia Pudding
The preparation of this pudding is straightforward and does not require any elaborate cooking techniques. Begin by combining your chia seeds, matcha powder, and almond milk in a bowl. Whisking these together ensures that the matcha is evenly distributed, preventing clumps from forming.
After mixing, let the chia seeds soak in the mixture for at least 30 minutes, preferably in the refrigerator. This soaking period allows the seeds to absorb the liquid, swelling and creating a pudding-like texture. For the best flavor, consider leaving it overnight, so the flavors meld beautifully.
Serving Suggestions and Variations
Ultimately, serving your Hydrating Matcha Chia Pudding can be customizable to match your dietary preferences or what you have on hand. Top it with fresh fruits such as sliced bananas, berries, or kiwi for natural sweetness and added vitamins. Nuts or seeds can also provide a delightful crunch and additional nutrition.
If you’re looking for different flavor profiles, try incorporating a tablespoon of almond or peanut butter for richness or adding a sprinkle of coconut flakes for an exotic touch. You can also switch up the base milk; oat or coconut milk can bring unique flavors without any dairy.
Storage Tips for Chia Pudding
One of the best aspects of chia pudding is its convenience and longevity. Once prepared, you can store your Hydrating Matcha Chia Pudding in an airtight container in the refrigerator for up to five days. This makes it an excellent option for meal prepping, saving you time during busy weekdays.
When you store the pudding, make sure to separate any fruit toppings until you're ready to serve them. This keeps the fruits fresh and ensures that they don’t make the pudding soggy. Before eating, simply give it a good stir to reincorporate the ingredients and enjoy a refreshing treat.
Why Choose Dairy-Free Options?
Adopting a dairy-free diet can have numerous health benefits, especially if you're looking to enhance skin clarity and support weight loss goals. Dairy can sometimes lead to increased inflammation or exacerbate conditions like acne for certain individuals, which is why exploring alternatives can be beneficial.
By choosing dairy-free options, like almond milk in the Hydrating Matcha Chia Pudding, you reduce the likelihood of digestive issues that lactose can cause for those intolerant. Additionally, non-dairy options often contain fewer calories and saturated fats, contributing positively to your overall health journey.
Read more about Dairy Free Recipes for Weight Loss and Clear Skin